Nginx 的强大,不在于它装得多快,而在于它配得有多灵活。前面我们已经完成了多种环境下的安装,接下来真正的重点来了:配置。几乎所有核心功能,都是通过精心编写的 .conf 文件实现的。学会配置,才算真正学会了用 Nginx。
Nginx 能反向代理、限流、负载均衡,全靠它的 .conf 文件来实现。我在多年的工作中总结了 Nginx 最常用的功能,接下来,本文将带入生产环境常用的实际场景,去解决如何配置 conf ,干货文章建议收藏。
一、负载均衡 单节点的反向代理配置,将 HTTP 请求转发的 Tomcat 服务器,但是只能代理到单节点,无法在集群中使用 。
1 server { 2 location /testapi/ { 3 proxy_pass http://178.168.1.10:9120/; 4 index /; # index.html index.htm; 5 proxy_set_header Host $host; 6 # 表示与这个nginx 直接通信的IP, 如果这个是第一层代理,这将是最真实的客户端IP 7 proxy_set_header X-Real-IP $remote_addr; 8 # 表示与这个nginx 直接通信的Port, 如果这个是第一层代理,这将是最真实的客户Port 9 proxy_set_header X-Real-Port $remote_port; 10 # NGINX 在转发请求时会将客户端的 IP 地址添加到 X-Forwarded-For 头部 11 proxy_set_header X-Forwarded-For $proxy_add_x_forwarded_for; 12 client_max_body_size 8M; 13 client_body_buffer_size 128k; 14 proxy_connect_timeout 10s; 15 proxy_send_timeout 60s; 16 proxy_read_timeout 60s; 17 } 18 } 而 负载均衡配置 用于将 HTTP 请求分布到多个节点的 Tomcat 服务器;负载均衡功能支持自动下线,当某一台节点服务端返回 500,则会自动下线该节点不再访问 。负载均衡的配置可以单独写成 conf 文件。
1 upstream openserver-api { 2 # ip_hash; 根据访问ip的hash结果分配 3 # least_conn;请求分配到连接数最少的服务 4 # fair; 请求分配到后端响应的时间最短 5 server 127.0.0.1:8900 weight=100 max_fails=10 fail_timeout=15s; 6 server 127.0.0.1:8901 weight=100 max_fails=10 fail_timeout=15s; 7 } 8 9 server { 10 location /test-api/{ 11 proxy_pass http://openserver-api/; 12 index /; # index.html index.htm; 13 proxy_set_header Host $host; 14 proxy_set_header X-Real-IP $remote_addr; 15 proxy_set_header X-Real-Port $remote_port; 16 proxy_set_header X-Forwarded-For $proxy_add_x_forwarded_for; 17 client_max_body_size 8M; 18 client_body_buffer_size 128k; 19 } 20 } 上面是按权重轮询服务,在15秒(fail_timeout)内该服务器出现了10次(max_fails)失败,负载均衡器就会停止向它发送请求。生产环境就是使用这样平均分配的策略;
除了轮询策略,还有其他负载均衡策略。在注释上标注了,去掉注释就可以直接使用,但是这些策略都不是平均分配的,需要自己去控制流量的大小,如果没有特殊的情况,还是建议轮询服务。
二、静态资源访问 2.1 配置网页 现在前端开发项目已经不是简单的 html 页面了,多是使用 Vue 等框架开发的,这里给出 Vue 前端项目的页面配置。
1 server { 2 location /page/ { 3 alias /home/user/web/page/dist/; 4 try_files $uri $uri/ /page/index.html; 5 } 6 } 当浏览器访问 https://example.com/page 时,nginx 会代理到 /home/user/web/page/dist/ 目录,此时,$uri 就表示 /page 。
try_files 会先检查 alias 目录下 page文件是否存在,存在则返回该文件;
然后会检查 page/ 目录是否存在,存在则返回 page/ 目录下的 index.xml(page 不带斜杠表示文件,page/ 带斜杠表示目录);
最后如果都找不到,则返回 /page/index.html ,此时 /page/ 表示相对目录,和上面的 location /page/ 表示一个意思,即 alias 表示的路径,所以 /page/index.html 完整的路径表示 /home/user/web/page/dist/index.html
alias 和 root 的区别?
alias 是一个目录别名的定义,可以直接替换,比如 /page/ 就表示 /home/user/web/page/dist/
root 是最上层目录的定义,访问 /page/ 则表示 访问 root 后面的目录 + /page/,即 /home/user/web/page/dist/page/
2.2 配置验证文件 在很多第三方页面嵌入到主应用,或者跳转第三方域名的时候,往往需要先提前校验域名是否合法。
一般做法是将一个文本校验文件放到域名根目录,例如要访问 https://example.com , 必须要求 https://example.com/mK49l7IJfF.txt 能访问,这里的 mK49l7IJfF.txt 就需要放到域名根目录,怎么做呢?
1 # 根路径,在 localtion 内部嵌套 2 location / { 3 alias /home/user/web/page/dist/; 4 try_files $uri $uri/ /index.html; 5 6 location = /mK49l7IJfF.txt { 7 alias /home/user/web/index/dist/mK49l7IJfF.txt; 8 } 9 } 10 11 # 普通路径, 在 localtion 内部嵌套 12 location /page/ { 13 alias /home/user/web/page/dist/; 14 try_files $uri $uri/ /page/index.html; 15 16 location = /page/mK49l7IJfF.txt { 17 alias /home/user/web/index/dist/mK49l7IJfF.txt; 18 } 19 } 如果文件一直访问不通 返回404,考虑 mK49l7IJfF.txt 文件是否 Nginx 存在权限不够,无法访问。
2.3 页面禁止缓存 为了提供响应速度,浏览器访问页面会有缓存,页面无法及时更新。如何彻底浏览器禁止缓存?需要在响应的请求头中加入禁止缓存头。
1 location / { 2 add_header Cache-Control "no-cache, no-store, must-revalidate"; 3 add_header Pragma "no-cache"; 4 add_header Expires 0; 5 } 2.4 配置404页面 可以通过指定error_page 404 触发显示 404页面,location 一定要配置在 server{} 目录下,否则不生效。
另外页面中如果存在图片等资源,请注意路径参数等问题。
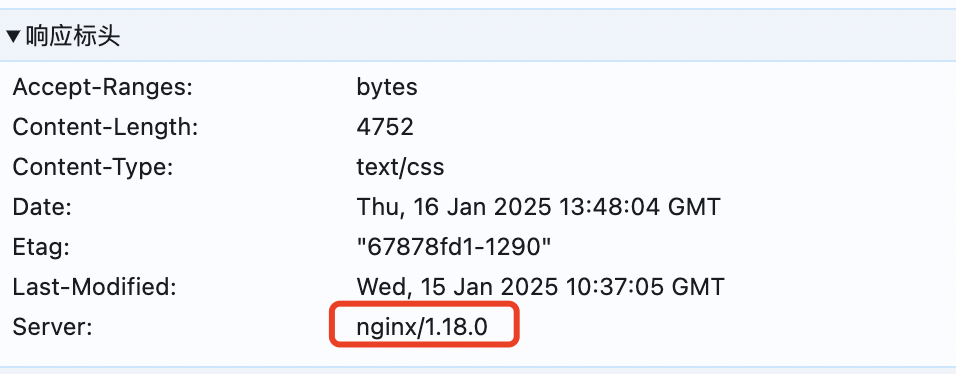
1 http{ 2 ... 3 # 设置全局的 404 错误页面 4 error_page 404 /404.html; 5 ... 6 } 7 8 server{ 9 ... 10 location = /404.html { 11 root /home/user/web/404/; 12 # 限制外部访问 13 internal; 14 } 15 ... 16 } 1 <!DOCTYPE html> 2 < html lang = "en" > 3 < head > 4 < meta charset = "UTF-8" > 5 < meta name = "viewport" content = "width=device-width, initial-scale=1.0" > 6 < title > 404 - Page Not Found </ title > 7 < style > 8 body { font-family : Arial, sans-serif; } 9 h1 { color : red; } 10 </ style > 11 </ head > 12 < body > 13 < h1 > 404 - Page Not Found 当前页面不存在 </ h1 > 14 </ body > 15 </ html > 三、隐藏版本号 在浏览器响应头里有 Server 项,这里返回的是当前服务 web 服务器的名称,如 Nginx、Kong 等。
但是这里不应该把服务器的版本号返回出来,万一版本有漏洞,会被针对攻击。所以如何隐藏版本号呢?
1 # 1、关闭 http{} 的 server_tokens 2 server_tokens off ; 3 4 5 #2、修改 ../nginx/conf/fastcgi_params 6 fastcgi_params SERVER_SOFTWARE 7 nginx/ $nginx_version 8 # 改为 9 fastcgi_params SERVER_SOFTWARE nginx fastcgi_params 这个文件里的存放的都是 Nginx 环境变量。
四、日志管理 4.1 日志定时分片 请直接参考这篇文章:别让日志撑爆磁盘!Nginx日志优化实战:自动分片、定时归档、轻松管理亿级日志
4.2 日志 JSON 格式化 将 Nginx 的日志格式化为 JSON,可以修改 log_format 指令,将日志字段转化为 JSON 格式。
JSON 格式的日志,更适合日志聚合和后续处理,比如 ELK, Flume 等工具。
JSON 格式化配置:
1 log_format json '{"remote_addr": " $remote_addr ", "connection": " $connection ", "connection_requests": " $connection_requests ", "remote_user": " $remote_user ", "time_local": " $time_local ", "request_length": " $request_length ", "request": " $request ", "status": " $status ", "request_time": " $request_time ", "upstream_response_time": " $upstream_response_time ", "body_bytes_sent": " $body_bytes_sent ", "content_length": " $content_length ", "http_x_forwarded_for": " $http_x_forwarded_for ", "upstream_addr": " $upstream_addr ", "http_referer": " $http_referer ", "http_user_agent": " $http_user_agent "}' ; 确保将此配置添加到 http 块中,并设置 access_log 指令以使用这个 JSON 格式:
1 http { 2 log_format json '{"remote_addr": " $remote_addr ", "connection": " $connection ", "connection_requests": " $connection_requests ", "remote_user": " $remote_user ", "time_local": " $time_local ", "request_length": " $request_length ", "request": " $request ", "status": " $status ", "request_time": " $request_time ", "upstream_response_time": " $upstream_response_time ", "body_bytes_sent": " $body_bytes_sent ", "content_length": " $content_length ", "http_x_forwarded_for": " $http_x_forwarded_for ", "upstream_addr": " $upstream_addr ", "http_referer": " $http_referer ", "http_user_agent": " $http_user_agent "}' ; 3 4 # 日志格式可以引用main ,也可以引用 json 5 access_log /var/log/nginx/access.log json; 6 } 日志将记录为 JSON 格式,示例如下:
1 { 2 "remote_addr" : "180.101.49.58" , 3 "connection" : "3" , 4 "connection_requests" : "1" , 5 "remote_user" : "-" , 6 "time_local" : "18/Jan/2025:08:02:38 +0000" , 7 "request_length" : "1237" , 8 "request" : "POST /api/queryList HTTP/1.1" , 9 "status" : "200" , 10 "request_time" : "0.112" , 11 "upstream_response_time" : "0.111" , 12 "body_bytes_sent" : "1574" , 13 "content_length" : "2" , 14 "http_x_forwarded_for" : "-" , 15 "upstream_addr" : "180.101.49.58:18105" , 16 "http_referer" : "http://example.com:18105/query/?token=erwerwer&activityId=werwer&level=100" , 17 "http_user_agent" : "Mozilla/5.0 (Macintosh; Intel Mac OS X 10_15_7) AppleWebKit/537.36 (KHTML, like Gecko) Chrome/131.0.0.0 Safari/537.36 Edg/131.0.0.0" 18 } 五、灰度发布 如何基于 Nginx 设计灰度发布呢?请看这篇文章。主要运用的配置是负载均衡和权重策略。轻松搞定服务灰度发布!基于Nginx的流量分发与版本控制实战指南
六、拓展模块 6.1、限流功能 参考下面这篇文章: 高并发场景下接口防刷!3 分钟配置 Nginx 基于 IP 限流实战指南
6.2、禁止区域流量 简单的使用 deny 和 allow 配合使用。放在 http 、server、location 中都可以。
1 server { 2 listen 80 ; 3 server_name example.com; 4 5 # 允许特定 IP 地址 6 allow 192.168.1.1 ; 7 allow 203.0.113.2 ; 8 9 # 拒绝所有其他 IP 地址 10 deny all; 11 12 location / { 13 # 其他配置... 14 } 15 } 16 17 server { 18 listen 80 ; 19 server_name example.com; 20 21 # 禁止多个 IP 地址访问 22 deny 192.168.1.100 ; 23 deny 203.0.113.50 ; 24 25 location / { 26 # 其他配置... 27 } 28 } 也可以使用文件批量实现 IP 限制 ,然后把语法文件写入到 limitip.conf 文件中
1 server { 2 listen 80 ; 3 server_name example.com; 4 include /nginx/conf/limitip.conf; 5 ... 6 } 1 deny 192.168.1.100 ; 2 deny 203.0.113.50 ; 那只允许中国的 IP 访问怎么做呢?
1 http { 2 # 定义中国 IP 范围,默认所有 IP 都拒绝 3 geo $allowed_country { 4 default 0 ; # 默认拒绝所有 IP 5 # 以下为中国的 IP 地址段示例,请根据实际情况更新 6 101.0.0.0/8 1; 7 103.0.0.0/8 1; 8 106.0.0.0/8 1; 9 # 其他中国 IP 地址段... 10 } 11 12 server { 13 listen 80 ; 14 server_name example.com; 15 16 location / { 17 # 如果不是中国 IP,返回 403 Forbidden 18 if ( $allowed_country = 0 ) { 19 return 403 ; # 非中国 IP 返回 403 Forbidden 20 } 21 22 root /usr/share/nginx/html; 23 index index.html; 24 } 25 } 26 } 6.3、配置各种响应头 配置响应头是为了告诉浏览器某些操作,比如禁止缓存、禁止iframe嵌套等, Nginx 作为 Web 服务器,支持设置响应头 。加在 server 里可以全局统一
1 location / { 2 # 禁止浏览器缓存 3 add_header Cache-Control "no-cache, no-store, must-revalidate"; 4 add_header Pragma "no-cache"; 5 add_header Expires 0; 6 7 #该页面不允许在frame中展示,另外还有 SAMEORIGIN(表示该页面可以在相同域名页面的frame中展示), 8 # ALLOW-FROM url(页面可以在指定来源的frame中展示) 9 # 这个头加之前需要和前端同步 10 add_header X-Frame-Options:DENY 11 12 #启用XSS保护; 13 add_header X-Xss-Protection: 1; 14 add_header X-Xss-Protection: mod=block; 15 16 # 严格按照 Content-Type指定的类型加载,直接猜测 17 add_header X-Content-Type-Options "nosniff"; 18 19 #指定哪些域名可以访问当前资源 20 add_header Access-Control-Allow-Origin "*"; 21 22 #防止浏览器在下载文件时自动执行内容(如 JS 文件) 23 add_header X-Download-Options "noopen"; 24 25 # 默认只允许加载与页面相同源的资源,帮助防止跨站脚本攻击(XSS) 26 add_header Content-Security-Policy "default-src 'self';" always; 27 28 # 启用 HSTS,强制所有连接使用 HTTPS,禁止304 跳转 29 add_header Strict-Transport-Security "max-age=31536000; includeSubDomains; preload" always; 30 31 } 6.4、防止 DNS欺骗 恶意域名解析 DNS 欺骗可以将非法域名解析到服务器上,导致服务器被恶意访问,在原有配置的上面可以添加一个默认 server ,当其他域名或通过 IP 访问的时候,由于匹配不到 server,就会走默认的 server, 返回444。
444 是 Nginx 服务器扩展的 HTTP错误状态码,服务器不向客户端返回任何信息,并关闭连接, 断开客户端和服务器的连接,防止恶意软件攻击威胁。 通过此方式直接通过IP 将无法访问。
1 server { 2 listen 80 default; 3 server_name _; # 匹配所有没有匹配到其他虚拟主机的请求 4 return 444 ; # 直接返回 444,关闭连接 5 } Q&A Q1:remote_addr 和 http_x_forwarded_for的 区别是什么? A: remote_addr 表示上游真实IP。假设用户和服务器间有多级代理,那么 remote_addr 就表示最接近服务器的那个代理。
remote_addr 无法伪造,因为建立 TCP 连接需要三次握手,如果伪造了源 IP,无法建立 TCP 连接,更不会有后面的 HTTP 请求。
如果上游是 nginx,那么 remote_addr 只能表示 nginx IP,而不是客户 IP;
http_x_forwarded_for 格式为 X-Forwarded-For: client, proxy1,它是一个请求头,表示多级代理的IP,可以完整的展示客户端到服务器间的代理链,每级代理需要将上级客户端IP(remote_addr)加到 X-Forwarded-For 后面。
所以 X-Forwarded-For 不包含最后一级代理,最后一级代理直接通过 remote_addr 获取。
计算方式:X-Forwarded-For = 最近代理获取到的 X-Forwarded-For + 最近代理获取到的 remote_addr。
所以服务如果通过 Nginx 代理访问,就要禁止直接访问服务,这是为了保证上级代理不会被伪造,否则客户端直连会伪造 IP 数据。 必须使用从 TCP 连接中得到的 Remote Address 才是真实的,其他均不可信!
请一定记住:
1、使用 Nginx 就要禁掉直连服务,保证上级代理不会被伪造请求头;
2、单 Nginx 转发,X-Real-IP 和 X-Forwarded-For 最后一节为真实客端 IP;
3、多 Nginx 转发,X-Real-IP 和 X-Forwarded-For 最后一节为倒数第二级代理IP,建议直接将第一级转发;
Q2: Nginx 访问异常,有时能访问到 有时候访问不到? 排查发现:
1、域名本身过期;
2、域名证书过期;
3、域名没有备案;
只要服务器在国内,所有的域名,包括 hosts 自定义的的域名在国内都需要备案。
Q3 : 走 Nginx 压测后端服务出现问题? Nginx 负载到两个节点上,流量直接走Nginx ,使用 Jmter 压测服务,接口一直响应超时返回502,QPS 上不去。
查询 Nginx 日志发现异常,从日志可以看出, Nginx 获取上游响应超时,但是直接压测服务不走 Nginx 的话,就没有这个问题,这说明服务端没有问题,而是 Nginx ->api 这个路径出现问题, Nginx 负载出现问题, 请求还没到 Tomcat ?
报错日志如下:
1 1、 upstream server temporarily disabled while connecting to upstream 2 2 、(upstream timedout( 110 : Connection timedout)whilereading response header from upstream) 3 3 、 no live upstreams while connecting to upstream, 解决方案如下:
1、填加超时配置:max_fails 重试次数,fail_timeout = 超时重试时间,keepalive 保持长连接时间,(Http1.1,默认支持长连接,可以减少 TCP 创建)
1 # 10秒内连续出现超过2次 2 server 127.0.0.1:9501 max_fails= 2 fail_timeout= 10s weight= 1 ; 3 server 127.0.0.1:9502 max_fails= 2 fail_timeout= 10s weight= 1 ; 4 keepalive 10 ; 2、nginx->API 链路大量 TCP 被断开,检查 TCP 连接是否存在异常。
1 # 统计TCP状态数量 2 netstat -n | awk '/^tcp/ {++state[ $NF ]} END {for(key in state) print key,"\t",state[key]}' 3 4 # 返回如下结果 5 FIN_WAIT_1 1 6 CLOSE_WAIT 8 7 TIME_WAIT 44 8 ESTABLISHED 42 1 location ^~ /xxxxxx/ { 2 ... 3 # 强制走http 1.1,默认会采用 Keep-Alive 4 proxy_http_version 1 . 1 ; 5 ... 6 } 7 参考 https://xiezefan.me/2017/09/27/nginx-502-bug-trace/ 3、排除nginx 所在的服务器 内核参数设置太小导致丢包的可能性
以上就是本文的全部内容。
阅读原文:原文链接


 400 186 1886